Understanding the Veneer Hub
What is the Veneer Hub?
The veneer hub serves as a central resource for individuals seeking information, products, and ideas centered around wood veneers and wall paneling. It acts as an online marketplace where consumers can explore the vast variety of wood veneers available, catering to diverse applications in home and commercial design. Offering both aesthetic and functional benefits, the veneer hub incorporates decorative wall panels made from high-quality wood veneers. These products not only enhance the overall look of spaces but can also support practical uses such as sound insulation and thermal regulation. With an unwavering focus on quality and creativity, the veneer hub aims to connect a broad audience with the solutions that best suit their projects.
The Benefits of Using the Veneer Hub
The veneer hub offers numerous advantages for designers, contractors, and DIY enthusiasts alike. Firstly, the variety of products available ensures that customers can find the ideal wood veneer to match their design vision. The versatile application allows consumers to incorporate veneers into numerous areas, including feature walls, furniture, cabinetry, and much more. Additionally, utilizing the veneer hub can significantly reduce waste, as only a thin layer of wood is used to create beautiful surfaces. Not only does this approach minimize environmental impact, but it also allows for cost savings. Furthermore, veneers are lightweight and easy to install, which streamlines the process for professionals and homeowners alike. When you explore the veneer hub, you’ll discover an array of products and resources that make woodworking accessible to everyone.
Types of Wood Veneer Available
Wood veneers come in a multitude of types, each offering unique appearances and characteristics. Common categories include:
- Natural Wood Veneers: Crafted from real wood logs, these veneers retain the authentic natural grains and colors, enhancing the beauty of any project.
- Reconstituted Veneers: These are engineered from sustainable sources, allowing for uniform patterns and colors while maintaining a natural wood appearance.
- Dyed Veneers: Popular for artistic projects, dyed veneers can be altered to fit a specific color scheme, providing creative freedom unmatched by standard veneers.
- Backed Veneers: Often reinforced with materials like paper or fabric, backed veneers are easier to handle and install without risk of cracking.
Each type of veneer is suitable for varying applications, ensuring that whether for residential or commercial use, there are options tailored to meet project specifications.
Installation Techniques for the Veneer Hub
Preparation Steps Before Installation
Proper preparation is crucial for a successful veneer installation. Before starting, it’s essential to follow these steps:
- Gather Materials: Ensure that all tools and materials are on hand, such as the selected veneer, adhesive, utility knife, measuring tape, and a straight edge.
- Choose the Right Surface: The installation surface should be clean, dry, and free from dust or grease, which can impair adhesion.
- Plan Your Layout: Before cutting the veneer, outline your design or layout to minimize waste and ensure that the grain patterns flow smoothly between pieces.
Tools and Materials Needed
Having the right tools on hand will significantly impact the quality of your veneer installation. Essential tools include:
- Utility knife or veneer saw
- Wood glue or contact adhesive
- Clamp or weight for securing pieces while drying
- Sandpaper (for smoothing edges)
- Clean rags or towels for excess adhesive cleanup
- Measuring tape and straight edge for precise cuts
These basic tools will facilitate a neat and efficient installation process, yielding a professional finish.
Step-by-Step Installation Guide
Once properly prepared, installation can commence. Follow these steps for a successful veneer application:
- Measure and Cut: Using a measuring tape, mark the dimensions of the veneer pieces needed. Cut carefully with a utility knife or veneer saw for clean edges.
- Apply Adhesive: Follow the adhesive manufacturer’s instructions for application, spreading an even layer onto the surface and the veneer edges to ensure a strong bond.
- Place the Veneer: Align the veneer with the layout planned. Once positioned, gently press down to adhere and eliminate any air bubbles.
- Secure the Veneer: Use clamps or weights to hold the veneer in place as it dries, ensuring that it properly adheres to the substrate.
- Final Touches: Once the adhesive is dry, trim any excess veneer for an even finish and sand the edges if necessary.
Design Ideas with the Veneer Hub
Incorporating the Veneer Hub in Different Rooms
The versatility of veneers allows for creative applications across various rooms. Here are several ideas:
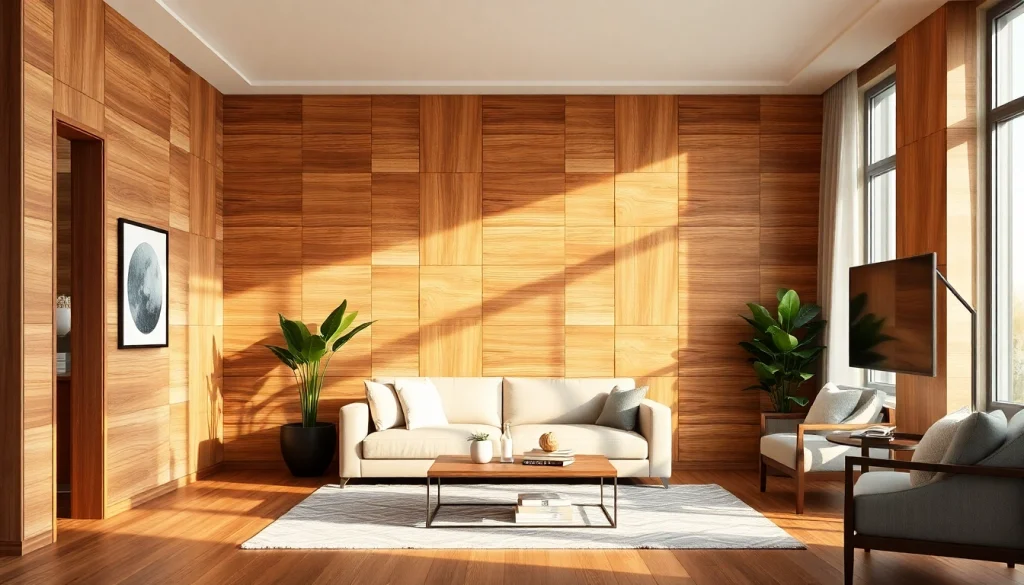
- Living Rooms: Utilize wood veneers for accent walls or as a backdrop for entertainment units to create a focal point.
- Kitchens: Apply veneer to cabinets or islands to add warmth and texture, enhancing the overall design without compromising function.
- Offices: Use sound-dampening veneers for wall paneling to create a serene working environment, improving acoustics while designer features enhance the overall space.
- Bathrooms: Opt for water-resistant veneers as trim or cabinetry finishes, marrying aesthetics with practicality.
Combining Colors and Textures
A big design strength of the veneer hub is its ability to blend different colors and textures. Designers can experiment with:
- Contrasting Hues: Pair dark woods with light cabinetry to create a modern aesthetic.
- Mixing Materials: Combining wood veneers with other materials like metal or glass can create unique contrasts that draw the eye.
- Layering Patterns: Variations in grain and texture can lead to a visually dynamic environment when designed thoughtfully.
Creating Feature Walls
Feature walls provide a striking visual impact in any space. Here are tips for creating memorable feature walls using veneers:
- Geometric Patterns: Cut veneer into geometric shapes to form an eye-catching wall piece.
- Textured Panels: Integrate different textures on a single wall for a tactile experience.
- Contrast with Paint: Pair veneer feature walls with bold paint colors for vibrancy.
Maintenance and Care for the Veneer Hub
Cleaning Tips for Longevity
To maintain the beauty of wood veneer, regular cleaning is important. Here are some effective tips:
- Use a soft, dry cloth to dust surfaces and prevent accumulation of dirt.
- Avoid using harsh chemicals or abrasive materials that can damage the veneer finish.
- For deeper cleaning, dampen a cloth with mild soap solution, wiping gently and drying immediately.
Repairing Damage
Minor damages like scratches or dents can often be repaired easily. Consider these steps:
- Use a wood filler or wax stick that matches the veneer color to fill in scratches.
- If the veneer lifts, apply adhesive beneath the edge and press firmly, using clamps to hold it until set.
- For deeper gouges, sanding and refinishing may be necessary to blend in the repair.
Enhancing Durability with Finishes
Applying a finish can enhance the durability of your veneer. Consider the following options:
- Clear Coats: Applying a clear polyurethane coat can protect against scratches and moisture.
- Oil Finishes: These maintain a natural appearance while enhancing sheen and protection.
- Waxing: Regular waxing can preserve the surface luster while providing a protective layer.
Frequently Asked Questions about the Veneer Hub
What is the cost of installing the Veneer Hub?
The installation cost for veneer varies based on the materials used and project complexity. Typically, budget for $5 to $15 per square foot, including labor.
How do I choose the right veneer?
Choosing the right veneer depends on design preferences, application requirements, and budget. Consider factors like grain patterns, color, and type for your project.
Are there environmental considerations with veneers?
Many veneers are sourced from sustainably managed forests. Look for certifications like FSC to ensure responsible sourcing.
Can I install the veneer myself?
Yes, with proper tools and techniques, many DIY enthusiasts can install veneers successfully. Always follow guidelines for the best results.
What maintenance do veneers require?
Veneers require regular dusting and occasional cleaning with mild soap. Avoid excessive moisture and harsh cleaners to prolong their lifespan.